
Master the Battlefield: The Ultimate Cursed Tank Simulator Controls and Gameplay Guide
Learn every keybind, module mechanic, and ammunition type in this comprehensive Cursed Tank Simulator controls guide to dominate the Roblox battlefield.
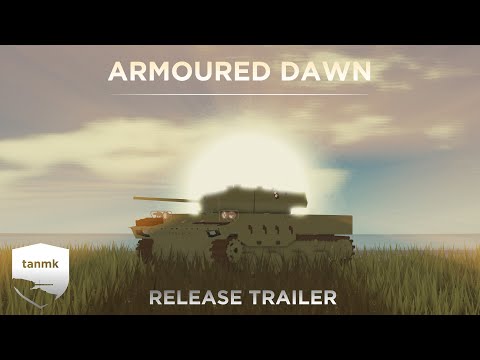 Official mediaLearn every keybind, module mechanic, and ammunition type in this comprehensive Cursed Tank Simulator controls guide to dominate the Roblox battlefield.YouTube
 Cursed Tank Simulator is one of the most mechanically deep games on the Roblox platform, often drawing comparisons to hardcore military sims like War Thunder. Mastering the cursed tank simulator controls is the first step toward moving from a "metal death box" to a dominant force on the leaderboard. Whether you are aiming for your first kill or grinding for top-tier blueprints, understanding the nuances of the cursed tank simulator controls will significantly shorten your learning curve and keep your crew alive.
With over 500 hours of potential grind to unlock every part, the game demands more than just quick reflexes. It requires a tactical understanding of how your specific turret, hull, and gun interact with the environment. This guide serves as your comprehensive manual for everything from basic movement to advanced fire control systems.
Essential Keybinds and Tactical Controls
The barrier to entry in this simulator is often the sheer number of inputs required to manage a modern (or cursed) armored vehicle. Unlike arcade shooters, your tank's systems are divided into specific modules that require manual oversight.
Basic Movement and Interaction
While WASD handles your primary movement, the secondary controls are what separate the veterans from the novices. For instance, using the "Freelook" feature allows you to scan your surroundings without giving away your position by rotating your massive turret.
| Keybind | Action | Description |
|---|---|---|
| W, A, S, D | Movement | Standard tank driving (Forward, Left, Reverse, Right). |
| LMB | Fire Main Gun | Discharges your primary armament. |
| Spacebar | Secondary Guns | Fires coaxial or roof-mounted machine guns. |
| R | ATGM Launchers | Fires Anti-Tank Guided Missiles (if equipped). |
| C | Freelook | Locks the gun in position while you rotate the camera. |
| TAB | Leaderboard | View player stats, kills, and team tickets. |
| X | X-Ray Vision | View internal modules and crew health status. |
| B | Binoculars | Provides a high-vantage view from above the cupola. |
| U | Cinematic Mode | Toggles all UI off for screenshots or immersion. |
| M | Drone Launch | Deploys a scouting drone with a 240-second lifespan. |
Advanced Combat Systems
As you progress into higher tiers, your cursed tank simulator controls will expand to include Fire Control Systems (FCS) and rangefinding. In top-tier matches, eyeballing your shots is a recipe for disaster. You must utilize the rangefinder (Right Mouse Button while scoped) to calculate bullet drop.
In turrets equipped with a modern FCS, the game will automatically adjust your gun's elevation once a range is found. This "Laser Rangefinding" is nearly instantaneous, whereas older "Stereoscopic Rangefinding" takes several seconds to calculate.
| Tactical Key | Function | Strategic Use |
|---|---|---|
| RMB (Hold) | Zoom / Scope | Essential for long-distance engagements. |
| RMB (Click) | Rangefinder | Calculates distance to target and adjusts zeroing. |
| H | Toggle FCS Sight | Enables or disables the advanced digital overlay. |
| ~ (Tilde) | Hull Aiming | Allows the hull to pivot for guns with limited traverse. |
| I / P | Freecam Elevation | Adjusts camera height in custom server freecam mode. |
Understanding Tank Modules and Crew Roles
In Cursed Tank Simulator, there is no traditional "HP" bar. Instead, the game uses a module-based damage system. If your engine is destroyed, you stop moving; if your ammo rack is hit, you explode. Player experience suggests that knowing which crew member does what can help you decide whether to retreat or stay in a fight.
The Human Element: Crew Functions
Your crew consists of four primary roles. When a crew member is "painted on the interior" (killed), a surviving member will eventually shift positions to cover the vacancy, though this takes time and incurs a performance penalty.
| Crew Member | Primary Responsibility | Penalty if Killed |
|---|---|---|
| Commander | Repair & Replacement | Slower repair speeds for all modules. |
| Loader | Shell Loading | Reload speed is halved (50% slower). |
| Gunner | Turret & Aiming | Cannot rotate turret or fire until replaced. |
| Driver | Movement | Tank becomes a stationary target until replaced. |
Internal Modules: The Tank's Anatomy
Using the cursed tank simulator controls to toggle X-ray (X) frequently is vital for monitoring these components. A green module is healthy, while red or black indicates critical failure.
- Engine & Radiator: The engine provides mobility but can catch fire if the radiator is destroyed.
- Ammo Racks: These are your biggest liability. Carrying a full load of ammo increases the physical size of these racks, making you easier to "one-shot."
- Transmission: Located usually at the front or rear; if broken, you lose the ability to shift gears.
- Horizontal/Vertical Drives: These control turret rotation and gun elevation. If damaged, your aim becomes sluggish.
Armor Types and Defensive Strategy
Not all steel is created equal. The game features a complex layer of primary and secondary armor types. Understanding these will help you decide which shells to use against specific enemies.
| Armor Type | Best Against | Weakness |
|---|---|---|
| RHA / CHA | Small arms, Low-tier AP | High-pen Kinetic shells. |
| NERA | Chemical (HEAT) & Kinetic | Repeated hits in the same spot. |
| Composite | Chemical Rounds | Virtually no effect against Kinetic. |
| ERA | Single-use Chemical protection | Tandem warheads & Autocannons. |
| Spaced Armor | HEAT Jets | APFSDS (Sabo) rounds. |
Community reports often highlight "Wheels" as a surprisingly effective makeshift armor. For reasons unknown to many new players, the rubber wheels on certain hulls can absorb high-caliber hits that would otherwise penetrate the main chassis.
Ammunition Mastery: Choosing Your Rounds
Your choice of ammunition is just as important as your cursed tank simulator controls proficiency. Carrying a mix of shells is recommended for different engagement types.
Kinetic Shells (The "Darts")
These rely on pure speed and mass to punch through armor.
- APFSDS: The gold standard for high tiers. It has the flattest trajectory and highest penetration.
- APHE: A unique hybrid that penetrates like a solid shot but explodes inside the crew compartment.
Chemical Shells (The "Explosives")
These use chemical energy or shaped charges to deal damage.
- HEAT / HEAT-FS: Uses a copper jet to pierce armor. Excellent for heavy tanks but negated by NERA and ERA.
- HESH: "Squashes" against the armor to send a shockwave through the hull. It actually performs better against sloped armor.
- ATGM: Guided missiles that allow you to adjust the flight path mid-air. Use the R key to launch and your mouse to steer.
Game Modes and Objectives
To maximize your Yen and Quid earnings, you must play the objective. Each mode requires a different tactical approach.
- Team Deathmatch (TDM): Pure attrition. Every death removes tickets from your team.
- Domination: Hold three capture points. The more points you hold, the faster the enemy's tickets drain.
- Kill Confirmed: You must drive over the "dog tags" of fallen enemies to score the kill. This is a great mode for preventing long-range "camping."
- MVP: One player is marked on the map for everyone to see. Protecting your MVP while hunting the enemy's is the path to victory.
- King of the Hill (KOTH): A single, small point in the center. Instant capture, but high risk.
The Tier System and "Downtiering" Logic
Cursed Tank Simulator uses a 12-tier bracket system. Your tank's total tier is determined by its hull, turret, and gun. A common strategy among advanced players is "downtiering," where you use lower-tier parts to bring a powerful gun into a lower-tier match.
Downtiering Rules:
- You cannot use a part more than 1 tier above the bracket.
- Guns carry the most "weight" in tier calculation.
| Hull Tier | Turret Tier | Gun Tier | Resulting Match Tier |
|---|---|---|---|
| Tier 5 | Tier 5 | Tier 5 | Tier 5 Bracket |
| Tier 4 | Tier 4 | Tier 6 | Tier 5 Bracket |
| Tier 6 | Tier 4 | Tier 5 | Tier 5 Bracket |
Pro Tips for New Tankers
- Don't Overload Ammo: Use the slider during the spawn screen to take only 15–20 rounds. This reduces the size of your ammo racks and makes you less likely to explode when hit.
- Use the Drone: The M key launches a drone that can spot enemies behind hills. This is invaluable for indirect fire.
- Check the Map: Information is power. The minimap shows spotted enemies and the status of capture points.
- Stay Near Resupply: Green discs on the map are resupply points. They refill your ammo and missiles but be careful—they can fill your racks past your "safe" limit.
For more information on the latest updates and community-made blueprints, check out the official Roblox page to join the fray.
FAQ
How do I fix my tank if it stops moving?
You must wait for your Commander to initiate repairs or for a dead Driver to be replaced. Ensure you are in a safe spot, as repairing modules makes you a sitting duck. You can monitor repair progress using the X-ray feature in the cursed tank simulator controls.
What is the best shell for Tier 10+?
At higher tiers, APFSDS (Armor Piercing Fin Stabilized Discarding Sabot) is almost always the best choice due to the prevalence of Composite and NERA armor, which easily stop HEAT and HE rounds.
Can I play Cursed Tank Simulator on mobile?
Yes, the game supports mobile play, though the cursed tank simulator controls are condensed into on-screen buttons. Features like indirect fire and rangefinding are still available but may require more practice to master on a touchscreen.
How do I use the Rangefinder effectively?
While in the gunner's sight, click the Right Mouse Button (RMB) on your target. A distance number will appear. If your tank has a Fire Control System (FCS), the gun will automatically adjust. If not, you must manually aim using the horizontal lines in your scope that correspond to the distance measured.
Related Guides
Cursed Tank Simulator Artillery Calculator: The Ultimate Ballistics Guide
Master indirect fire in Roblox Cursed Tank Simulator. Learn how to use the artillery calculator, estimate range, and dominate with the M109.
Cursed Tank Simulator for Dummies: The Ultimate Beginner's Guide
Master Roblox's Cursed Tank Simulator with our beginner's guide. Learn about parts, building custom tanks, maps, and current community meta.
Cursed Tank Simulator Grinding Tips: Master the Battlefield and Unlock Modern Tanks Fast
Struggling to upgrade your tank? Use these expert Cursed Tank Simulator grinding tips to earn cash, unlock powerful modules, and dominate every match.
Cursed Tank Simulator How to Downtier: The Ultimate Strategy Guide
Master the art of downtiering in Cursed Tank Simulator. Learn the best part combinations, tier brackets, and ammo types to dominate the battlefield.